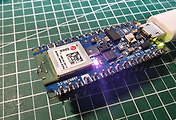
본 절은 [Arduino Nano 33 BLE Sense ] 아두이노 를 사용하기 위해 알아야 할 내용과 실습 방법에 대해 설명한다. 아두이노 의 특징, 동작원리, 사양, 연결 핀 배열, 출력 값, 주의사항을 알아본다. 아두이노와 를 연결하고, 간단한 코딩으로 를 쉽게 실습할 수 있다.
목차
[아두이노] Arduino Nano 33 BLE Sense 에서 블루투스 사용하기

BLE 및 Bluetooth 5 연결을 지원하는 Nina B306 모듈로 구동된다. 내장된 Bluetooth 모듈은 매우 낮은 전력을 소비하며 Arduino 라이브러리를 사용하여 쉽게 액세스 할 수 있다. 따라서 프로젝트를 보다 쉽게 프로그래밍하고 무선 연결할 수 있다. 프로젝트에 Bluetooth 기능을 추가하기 위해 외부 Bluetooth 모듈을 사용할 필요가 없다. 공간과 전력을 절약할 수 있다.

Arduino Nano 33 BLE Sense 라이브러리 설치
다음과 같이 Arduino Nano 33 BLE Sense 아두이노 를 연결할 수 있다.
https://www.arduino.cc/en/Reference/ArduinoBLE
Arduino - ArduinoBLE
This library supports all the Arduino boards that have the hardware enabled for BLE and Bluetooth 4.0 and above; these include Nano 33 BLE, Arduino NANO 33 IoT, Uno WiFi Rev 2, MKR WiFi 1010. To use this library#include A quick introduction to BLE Bluetoot
www.arduino.cc

Arduino Nano 33 BLE Sense -Arduino BLE 예 1 – 배터리 잔량 표시기
아두이노 IDE를 이용해 아두이노 Arduino BLE 예 1 – 배터리 잔량 표시기 소스코드를 로딩할 수 있다.

코드는 다음과 같다.
#include <ArduinoBLE.h>

BLEService batteryService("1101");
BLEUnsignedCharCharacteristic batteryLevelChar("2101", BLERead | BLENotify);

void setup() {
	Serial.begin(9600);
	while (!Serial);

	pinMode(LED_BUILTIN, OUTPUT);
	if (!BLE.begin())
	{
		Serial.println("starting BLE failed!");
		while (1);
	}

	BLE.setLocalName("BatteryMonitor");
	BLE.setAdvertisedService(batteryService);
	batteryService.addCharacteristic(batteryLevelChar);
	BLE.addService(batteryService);

	BLE.advertise();
	Serial.println("Bluetooth device active, waiting for connections...");
}

void loop()
{
	BLEDevice central = BLE.central();

	if (central)
	{
		Serial.print("Connected to central: ");
		Serial.println(central.address());
		digitalWrite(LED_BUILTIN, HIGH);

		while (central.connected()) {

      		int battery = analogRead(A0);
      		int batteryLevel = map(battery, 0, 1023, 0, 100);
      		Serial.print("Battery Level % is now: ");
      		Serial.println(batteryLevel);
      		batteryLevelChar.writeValue(batteryLevel);
      		delay(200);
		}
	}
	digitalWrite(LED_BUILTIN, LOW);
	Serial.print("Disconnected from central: ");
	Serial.println(central.address());
}
Arduino Nano 33 BLE Sense 동작확인
다음과 같이 동작 화면을 확인할 수 있다.
------------------------------------------------------
개발환경 : WINDOWS 10
아두이노 IDE : 1.8.13
------------------------------------------------------
01 연결
- 아두이노와 PC 연결
- 아두이노 IDE 실행
- 메뉴 → 툴 → 보드:아두이노 UNO 확인
- 메뉴 → 스케치 → 확인/컴파일
02 컴파일 확인
스케치>확인/컴파일(CTRL+R) 를 선택해서 컴파일을 진행한다.
03 아두이노 업로드
컴파일이 이상없이 완료되면 스케치>업로드(CTRL+U) 를 선택해서 컴파일 파일을 업로드 한다.

04 동작 확인
다음과 같이 동작을 확인할 수 있다.
안드로이드 앱을 설치한다.

아두이노 시리얼에서 다음과 같이 동작을 확인할 수 있다.

마무리
다음과 같이 참고 할 수 있다.
https://www.hackster.io/jithinsanal1610/arduino-nano-33-sense-ble-battery-level-tutorial-9644f9
Arduino Nano 33 Sense | BLE Battery Level Tutorial
Learn the basics of using BLE with Arduino using this easy example code step by step. By Jithin Sanal.
www.hackster.io
https://rootsaid.com/arduino-ble-example/
Arduino BLE Example Explained Step by Step - Arduino Projects and Robotics Tutorial
Arduino BLE Example for Beginners - Learn the basics of using BLE with Arduino using this easy example code. Step By Step Explained for Beginners.
rootsaid.com
https://ladvien.com/arduino-nano-33-bluetooth-low-energy-setup/
Getting Started with Bluetooth LE on the Arduino Nano 33 Sense
Data engineer, hardware developer, machine learning practitioner, writer, and eternal hacker.
ladvien.com
모두의 아두이노 환경 책
[모두의 아두이노 환경 ] 책은 예스24, 인터넷 교보문고, 알라딘, 인터파크도서, 영풍문고, 반디앤루니스 , 도서11번가 등에서 구입할 수 있다. 이 책에서는 PMS7003, GP2Y1010AU0F, PPD42NS, SDS011 미세먼지 , DHT22 온습도 , MH-Z19B 이산화탄소 , ZE08-CH2O 포름알데히드 , CCS811 총휘발성유기화합물 TVOC, GDK101 방사선(감마선) , MQ-131 오존(O3) , MQ-7 일산화탄소, MICS-4514 이산화질소 , MICS-6814 암모니아 , DGS-SO2 아황산가스(SO2) , BME280 기압 , GUVA-S12SD 자외선(UV) , MD0550 기류 , QS-FS01 풍속 (Wind speed) 를 사용한다.
모두의 아두이노 환경
아두이노와 로 내 건강을 지킬 수 있다!다양한 환경 를 실생활 프로젝트에 응용해보자!시중에 판매되고 있는 간이측정기도 로 값을 측정합니다. 똑같은 를 아두이노에 연결하
book.naver.com
'모두의 아두이노' 카테고리의 다른 글
| [아두이노][LCD] ST7735S IPS (SPI 인터페이스) TFT LCD 1.8인치 사용하기 (0) | 2021.12.15 |
|---|---|
| [아두이노] MP3 모듈 제어하기(DFPlayer Mini) (0) | 2021.12.14 |
| [아두이노] Arduino Nano 33 BLE Sense 에서 센서 사용하기 (0) | 2021.12.12 |
| [아두이노] Arduino NANO 33 BLE Sense 사용 하기 (0) | 2021.12.12 |
| [아두이노][#17] 적외선 IR 리모콘 사용하기 (0) | 2021.12.08 |


댓글